Easy DIY IKEA Hemnes Dresser Hack with O’verlays
Who doesn’t love a good IKEA hack? Check out this easy step-by-step DIY tutorial for how to give your IKEA Hemnes dresser or nightstand a makeover with O’verlays.
What seems like forever ago, we started working on Evie’s big girl room.
In our old house, she had her farmhouse nursery that I LOVED. Though my style has evolved past farmhouse, I still really love that room. It was the first time I designed a room from start to finish and I’m so proud of it.
Her room now in our new (well, really current) house is SO different and really reflective of how my personal style has changed over the years.
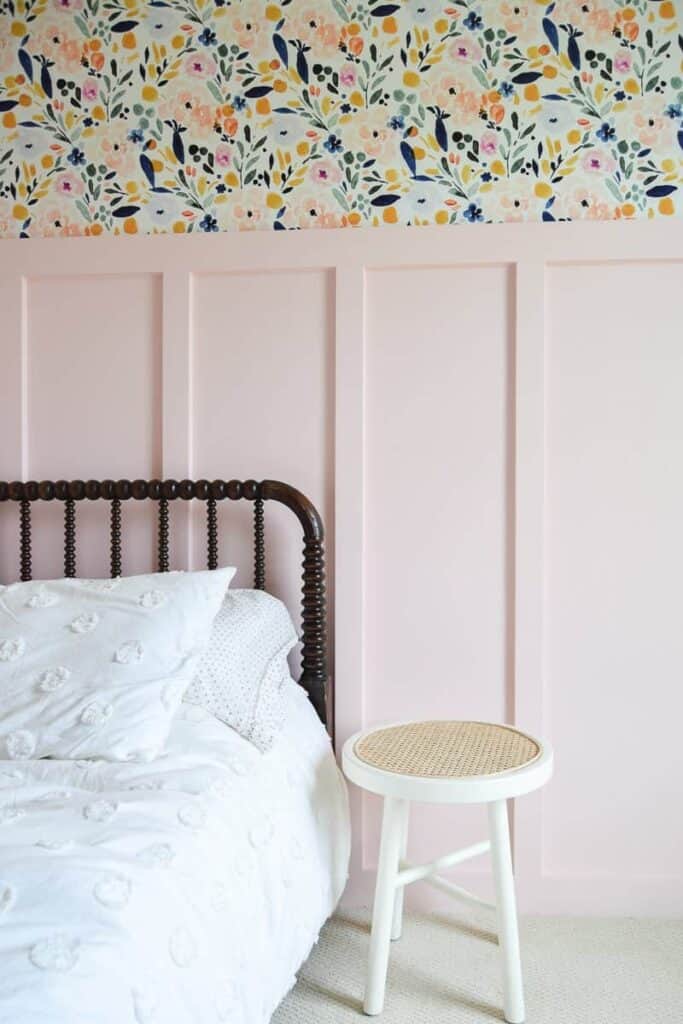
We added some bright, floral wallpaper over top of the pretty, pink painted board and batten.
This post contains affiliate links. Please, click here to read my disclosure policy.
Other Posts About Evie’s Room
- Evie’s Big Girl Room Design Plan
- How To Hem Curtains Without Sewing
- How to Make a DIY Cane Nightstand
- DIY Aged Black Pottery Using a Vintage Vase
- Floral Wallpaper Ideas for Girl’s Bedrooms and Nurseries
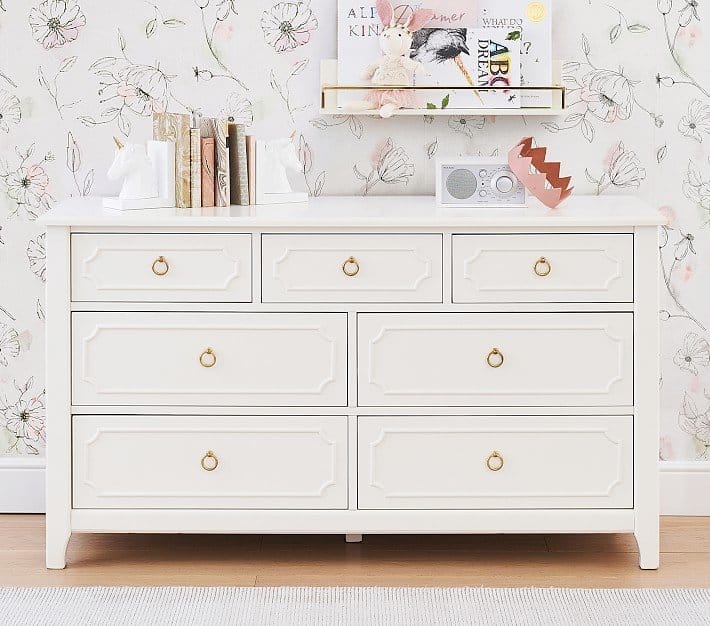
Dresser inspiration from Pottery Barn
The last big project in her room was DIYing a dresser!
I LOVED this Ava Regency dresser from Pottery Barn Kids, but um… not spending that much money on it!
O’verlay Panels
That’s when I decided it was time for a good ole’ IKEA hack using a Hemnes dresser and O’verlay panels!
What are O’verlay IKEA panels?
O’verlays are decorative overlay panels that come in several patterns and sizes. They are lightweight, paintable, and easily attached to furniture, doors, walls, and glass.
You can quickly and easily customize your furniture and home with O’verlays or use O’verlays Kits that are sized to fit the popular IKEA furniture lines.
O’verlays offers not only IKEA furniture panels, but also frames, door panels, trim kits, and corner attachments.
What type of IKEA overlays do they make?
O’verlay makes custom panels for several different “lines” of IKEA furniture. So if you’re on the hunt for overlays for IDEA furniture, you’ll probably be able to find just what you’re looking for! Check out everything they offer here.
- Billy bookcase
- Besta furniture
- Brimnes furniture
- Hemnes furniture (that’s what we’re using!)
- Kallax shelves
- Koppang furniture
- Kullen furniture
- Malm desks and dressers
- Micke desks
- Pax doors
- Rast furniture
- Tarva nightstands and dressers
What O’verlay IKEA furniture panels made out of?
O’verlays are made from a white PVC material. It is paintable, slightly flexible, and lightweight.
The furniture panels are very easy to cut if needed. You simply trim using a sharp blade and a straight edge as a guide. Keep in mind that any rough edges may be smoothed with fine-grit sandpaper or an emery board.
What type of paint can you use on O’verlays?
You can use spray paint (Rust-Oleum brand recommended) or interior latex paints like we did. The only paint that is not recommended is oil-based paints.
IKEA Hemnes Dresser Hack: The Plan
Once I decided that we were going to go with O’verlay IKEA furniture panels and found just the one I wanted that matched the Pottery Barn dresser I was eyeing, I went to work on a rendering.
I ended up drawing up this plan for what I wanted it to look like and paired it with the other elements in Evie’s room to make sure everything looked cohesive.
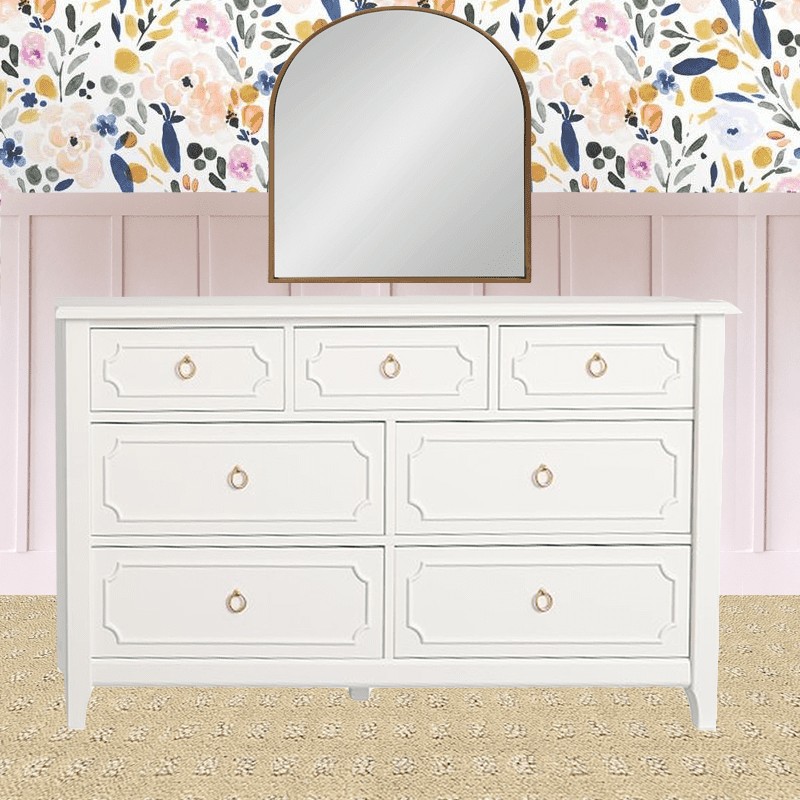
And here is what it looks like now!
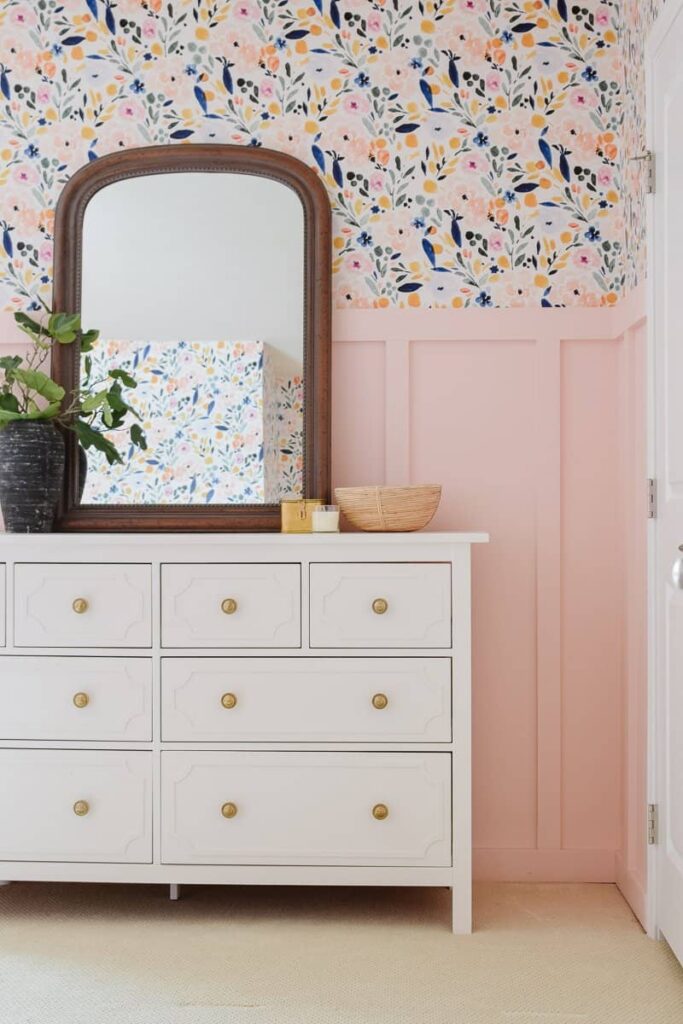
Honestly, it was SO easy to do and 100% worth the minimal effort to save $100s on the original Pottery Barn dresser. Let’s jump right into the tutorial!
DIY IKEA Hemnes Dresser Hack Supplies
- IKEA Hemnes Dresser – we used the 8-drawer dresser in “White”
- O’verlays Anne Kit for IKEA Hemnes 8 Drawer Dresser
- Zinsser Bin Primer
- Paint (we used Simply White by Benjamin Moore)
- Drop Cloth
- Paint Sprayer
- Fine Grit Sandpaper
- Rubbing Alcohol
- Lint-free Rag
- Adhesive (see Step 6 below for recommendations)
- Knobs
- Screw Driver
Step 1. Select your O’verlay kit
After reviewing the many IKEA furniture panel options on the O’verylays website, I chose the Anne Kit. It was perfect because it very closely resembled the Pottery Barn dresser that I was trying to mimic.
This is what you get with the Anne Kit (shown in Red below).
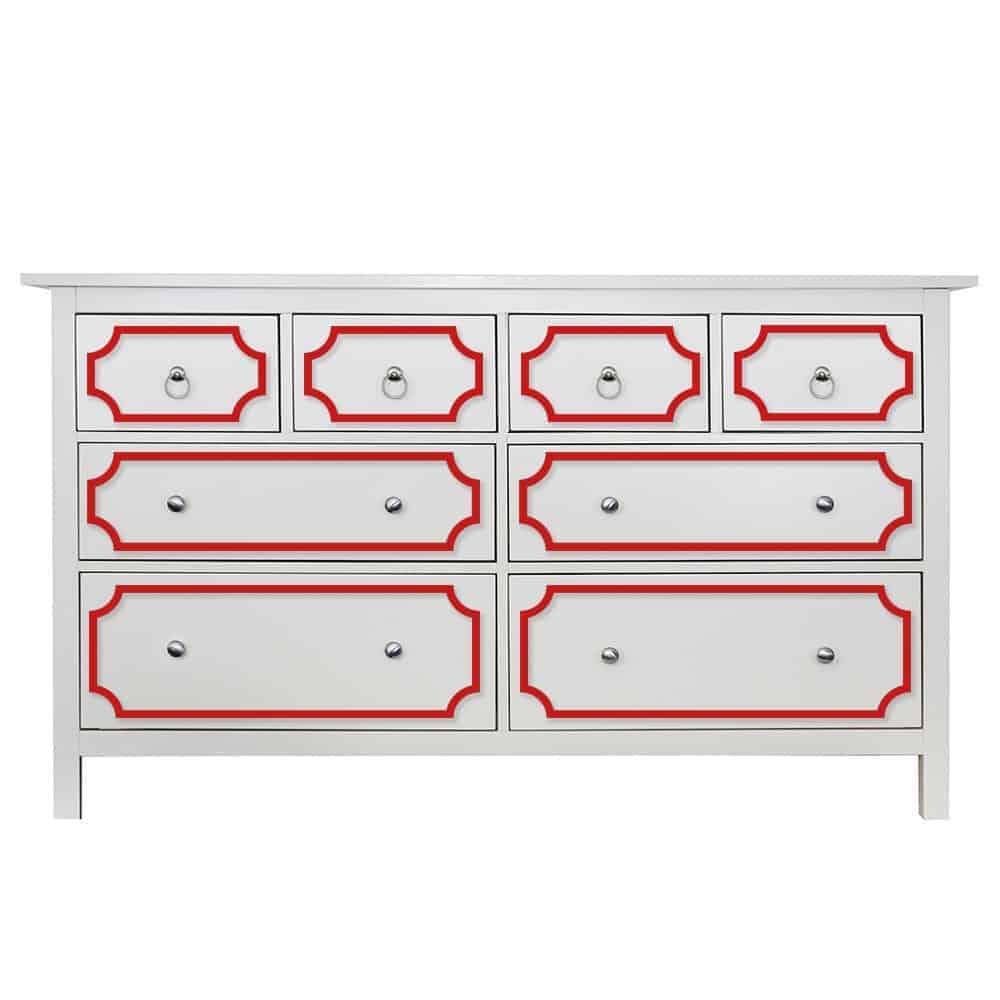
It’s everything you need to customize your Hemnes dresser!
Step 2. Prep and paint O’verlay panels
To prep your furniture panels for painting, use an emery board or fine sandpaper to lightly sand any rough edges if needed. Once sanded be sure to wipe off all of the sanding dust with a clean cloth.
It is also a good idea to wipe the panels down with rubbing alcohol to make sure they are clean before painting.
O’verlays provides detailed instructions with the kit. In the provided instructions, they recommend using spray paint to paint the O’verlays themselves.
But we are rebels and didn’t listen! We made the mistake of trying to roll them using a paintbrush. We quickly learned that it was difficult to get a totally smooth finish.
So, in the future, I would definitely recommend using spray paint.
Eventually, we decided to spray them with the paint sprayer.
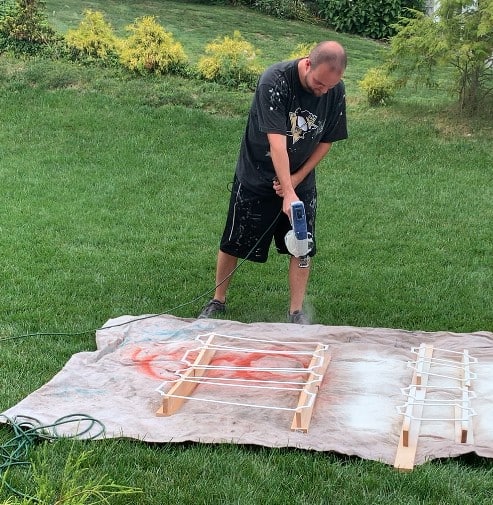
Place the panels on a flat surface and paint them with either spray paint or a paint sprayer. It is not necessary to use primer when painting them. Don’t forget to paint the edges too!
The brand mentions that you should avoid painting them in extreme heat or direct sun because it may cause the panels to warm when wet.
Repeat with a second coat of paint if needed. Since we weren’t changing the color dramatically we only needed one coat.
Allow them to dry completely.
Step 3. Prep dresser for painting
Get your IKEA dresser ready for paint by cleaning well. TSP, a TSP alternative, or even just a mix of vinegar and water works well for this.
Next, very lightly sand the surface of the dresser with fine-grit sandpaper to give your paint a good surface to adhere to. Don’t forget to also remove all sanding dust when you’re done.
Step 4. Prime dresser
You always need to prime IKEA furniture with Zinsser BIN Primer before painting. Keep in mind that this stuff STINKS. Like, horribly. So please use it outside with a full respirator on.
Really, the most important thing to keep in mind with IKEA hacks is using the right primer. Everything else is the same as any other piece of furniture you would paint.
If you’re wondering “do I need primer before painting?”, the answer is usually YES! Priming is a very important step that shouldn’t be skipped when painting any IKEA furniture.
Priming helps by:
- Creating a good surface for the paint to adhere to (which helps prevent peeling)
- Hiding and blocking any stains or wood tannins
- Reducing the number of coats of paint you’ll need to use
Step 5. Paint dresser
Once the primer dried, we painted two coats of Simply White by Benjamin Moore. The paint color we used is a warmer white than the stark white that comes with the IKEA Hemnes dresser.
This is a huge difference from the bold color we went with for the dresser in her nursery!
NOTE: If you don’t want to repaint the entire dresser, you can take a drawer with you to the paint shop to have them color match the IKEA color so you only need to paint the panels.
You can apply the paint with either a small foam roller, paintbrush, or paint sprayer. Whatever method you choose, work in multiple thin coats for the best results.
Step 6. Attach O’verlays panels to IKEA dresser
Once we had everything painted and it was fully dry, we glued the O’verlays onto the IKEA Dresser.
You’ll want to first make sure the backsides of the panels are super clean. You can do this with rubbing alcohol and a lint-free rag.
O’verlays recommends a few different types of glues for the panels, including:
- Gorilla Super Glue or Gorilla Super Glue Gel
- Liquid Nails Projects Multi-Purpose Adhesive
- Loctite Quick Set Epoxy
Step 7. Add knobs to drawers
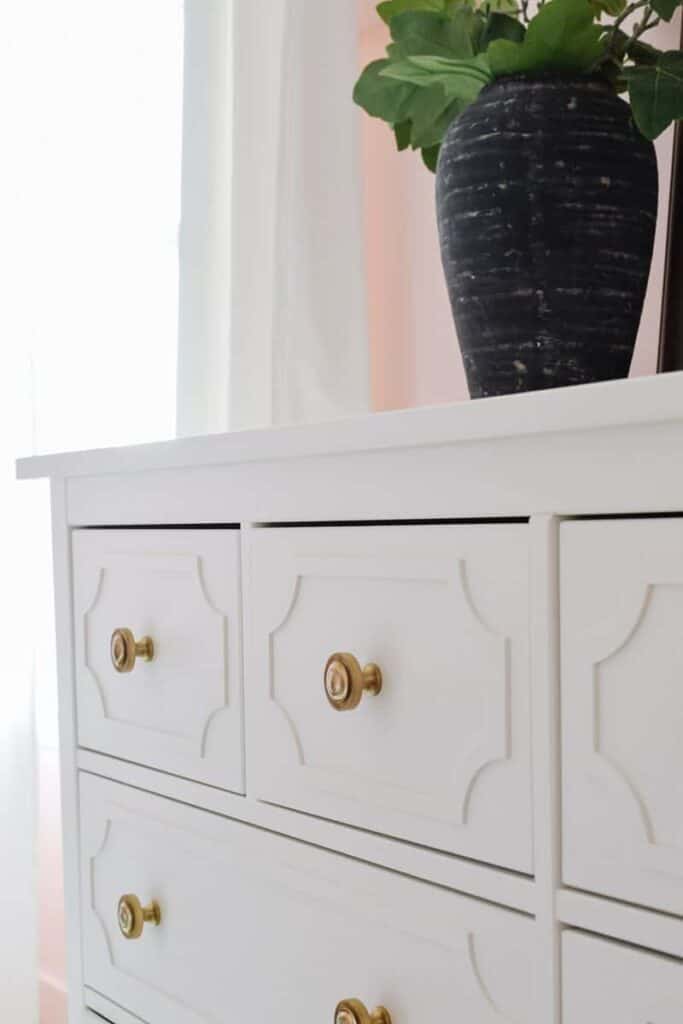
Then, we switched the IKEA stock hardware out for these gorgeous satin brass knobs with a screw driver.
Voila! I love how it looks!
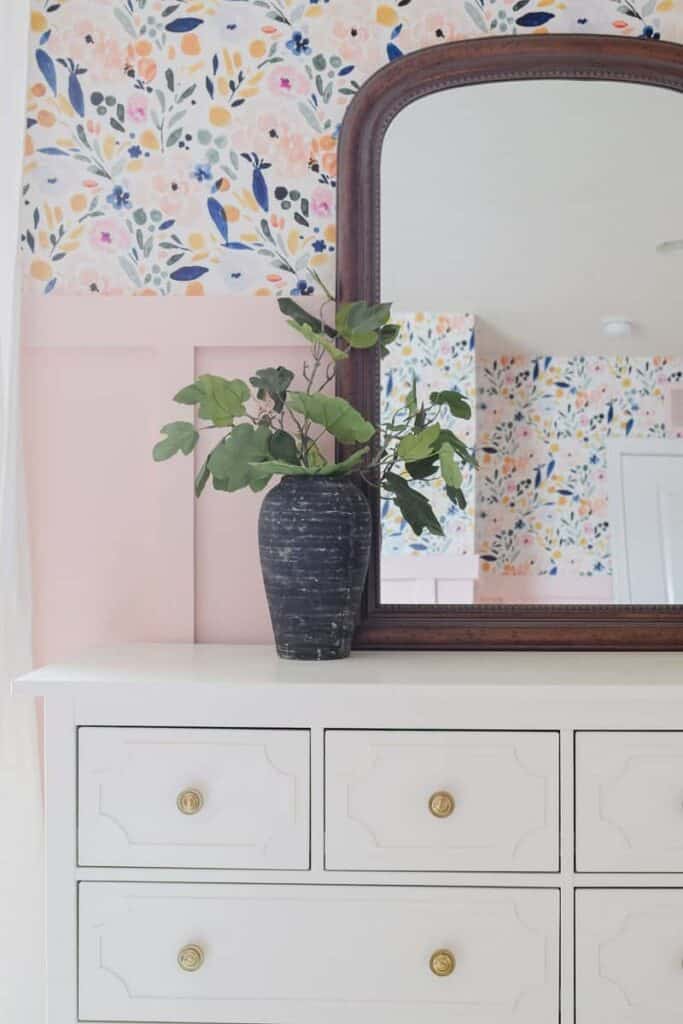
The O’verlays IKEA furniture panels really add so much depth to your typical Hemnes dresser. Even my mom said she thought it looked so much more expensive than it was!

If you’re looking for a simple yet impactful IKEA Hemnes dresser hack, check out O’verlays!
Other Room Sources
- Wall Paint Color (on Board and Batten): Dream Whip by Benjamin Moore
- Dresser Paint: Simply White by Benjamin Moore
- Wallpaper
- DIY vintage vase on dresser
- Mirror
DIY Ikea Hemnes Dresser Hack
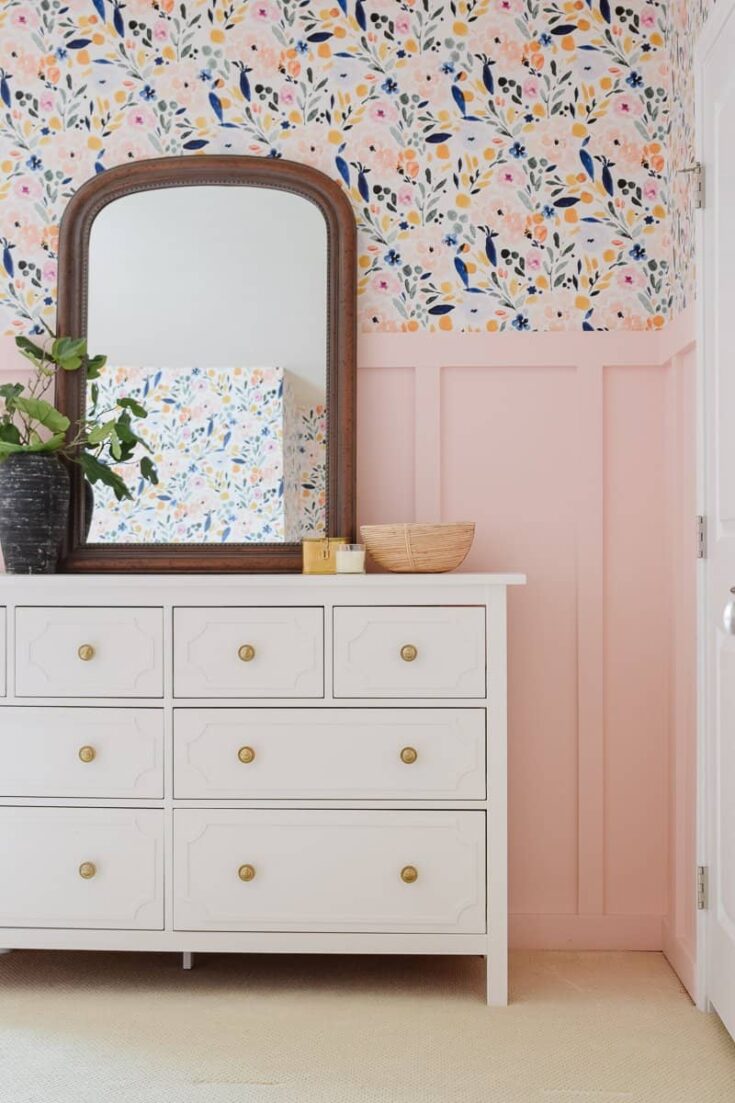
Easy step-by-step DIY tutorial for how to give your IKEA Hemnes dresser or nightstand a makeover with O'verlays.
Materials
- IKEA Hemnes Dresser - we used the 8-drawer dresser in "White"
- O'verlays Anne Kit for IKEA Hemnes 8 Drawer Dresser
- Zinsser Bin Primer
- Paint (we used Simply White by Benjamin Moore)
- Drop Cloth
- Paint Sprayer
- Fine Grit Sandpaper
- Rubbing Alcohol
- Lint-free Rag
- Adhesive
- Knobs
- Screw Driver
Instructions
- Select your O'verlay kit. We chose the Annie Kit.
- Prep and paint the O'verlay panels. We recommend using spray paint or a paint sprayer to paint your panels.
- Prep, prime and paint the dresser.
- Attach O'verlay panels to the Ikea dresser using glue that is recommended by the manufacturer.
- Add knobs to the drawers.

